
Analog film vs. digital
Yesterday I took my time to convert some Kodak Portra 160 120 roll film negatives to digital files using my self made scanner. Setup and processing are quite simple and the results are mind-blowing – at least in my opinion.
I would like to show you my simple setup and process in three parts:
1- Image samples film vs. digital (this part)
2- Film, camera and minimal scanning gear, settings and setup (coming soon)
3- Processing in Adobe Lightroom (coming soon)
Let us start with part one, with some image samples film vs. digital.
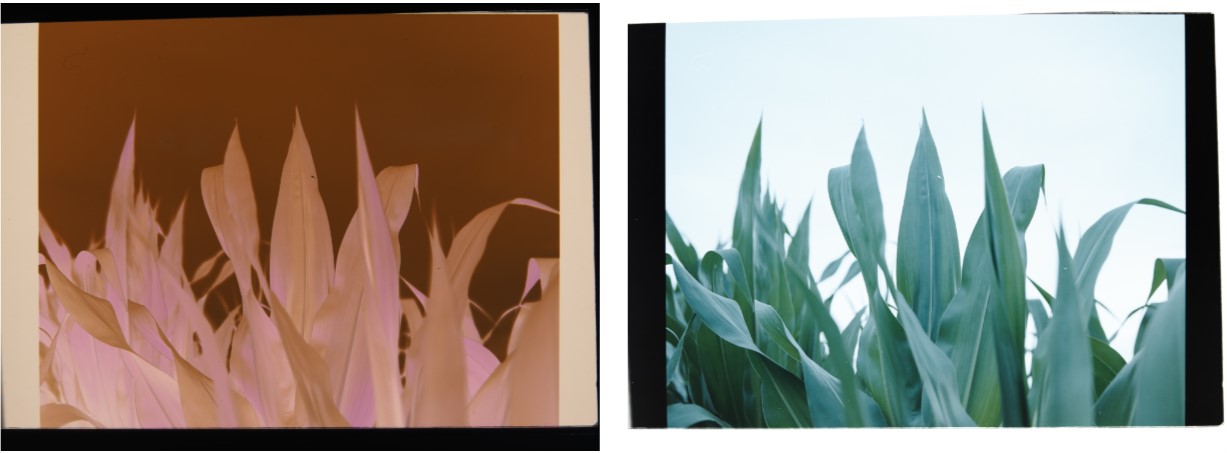
Photographing analog using the Mamiya 7 II and Kodak Portra 160 120 negative film
(Click to enlarge to full resolution, as always)

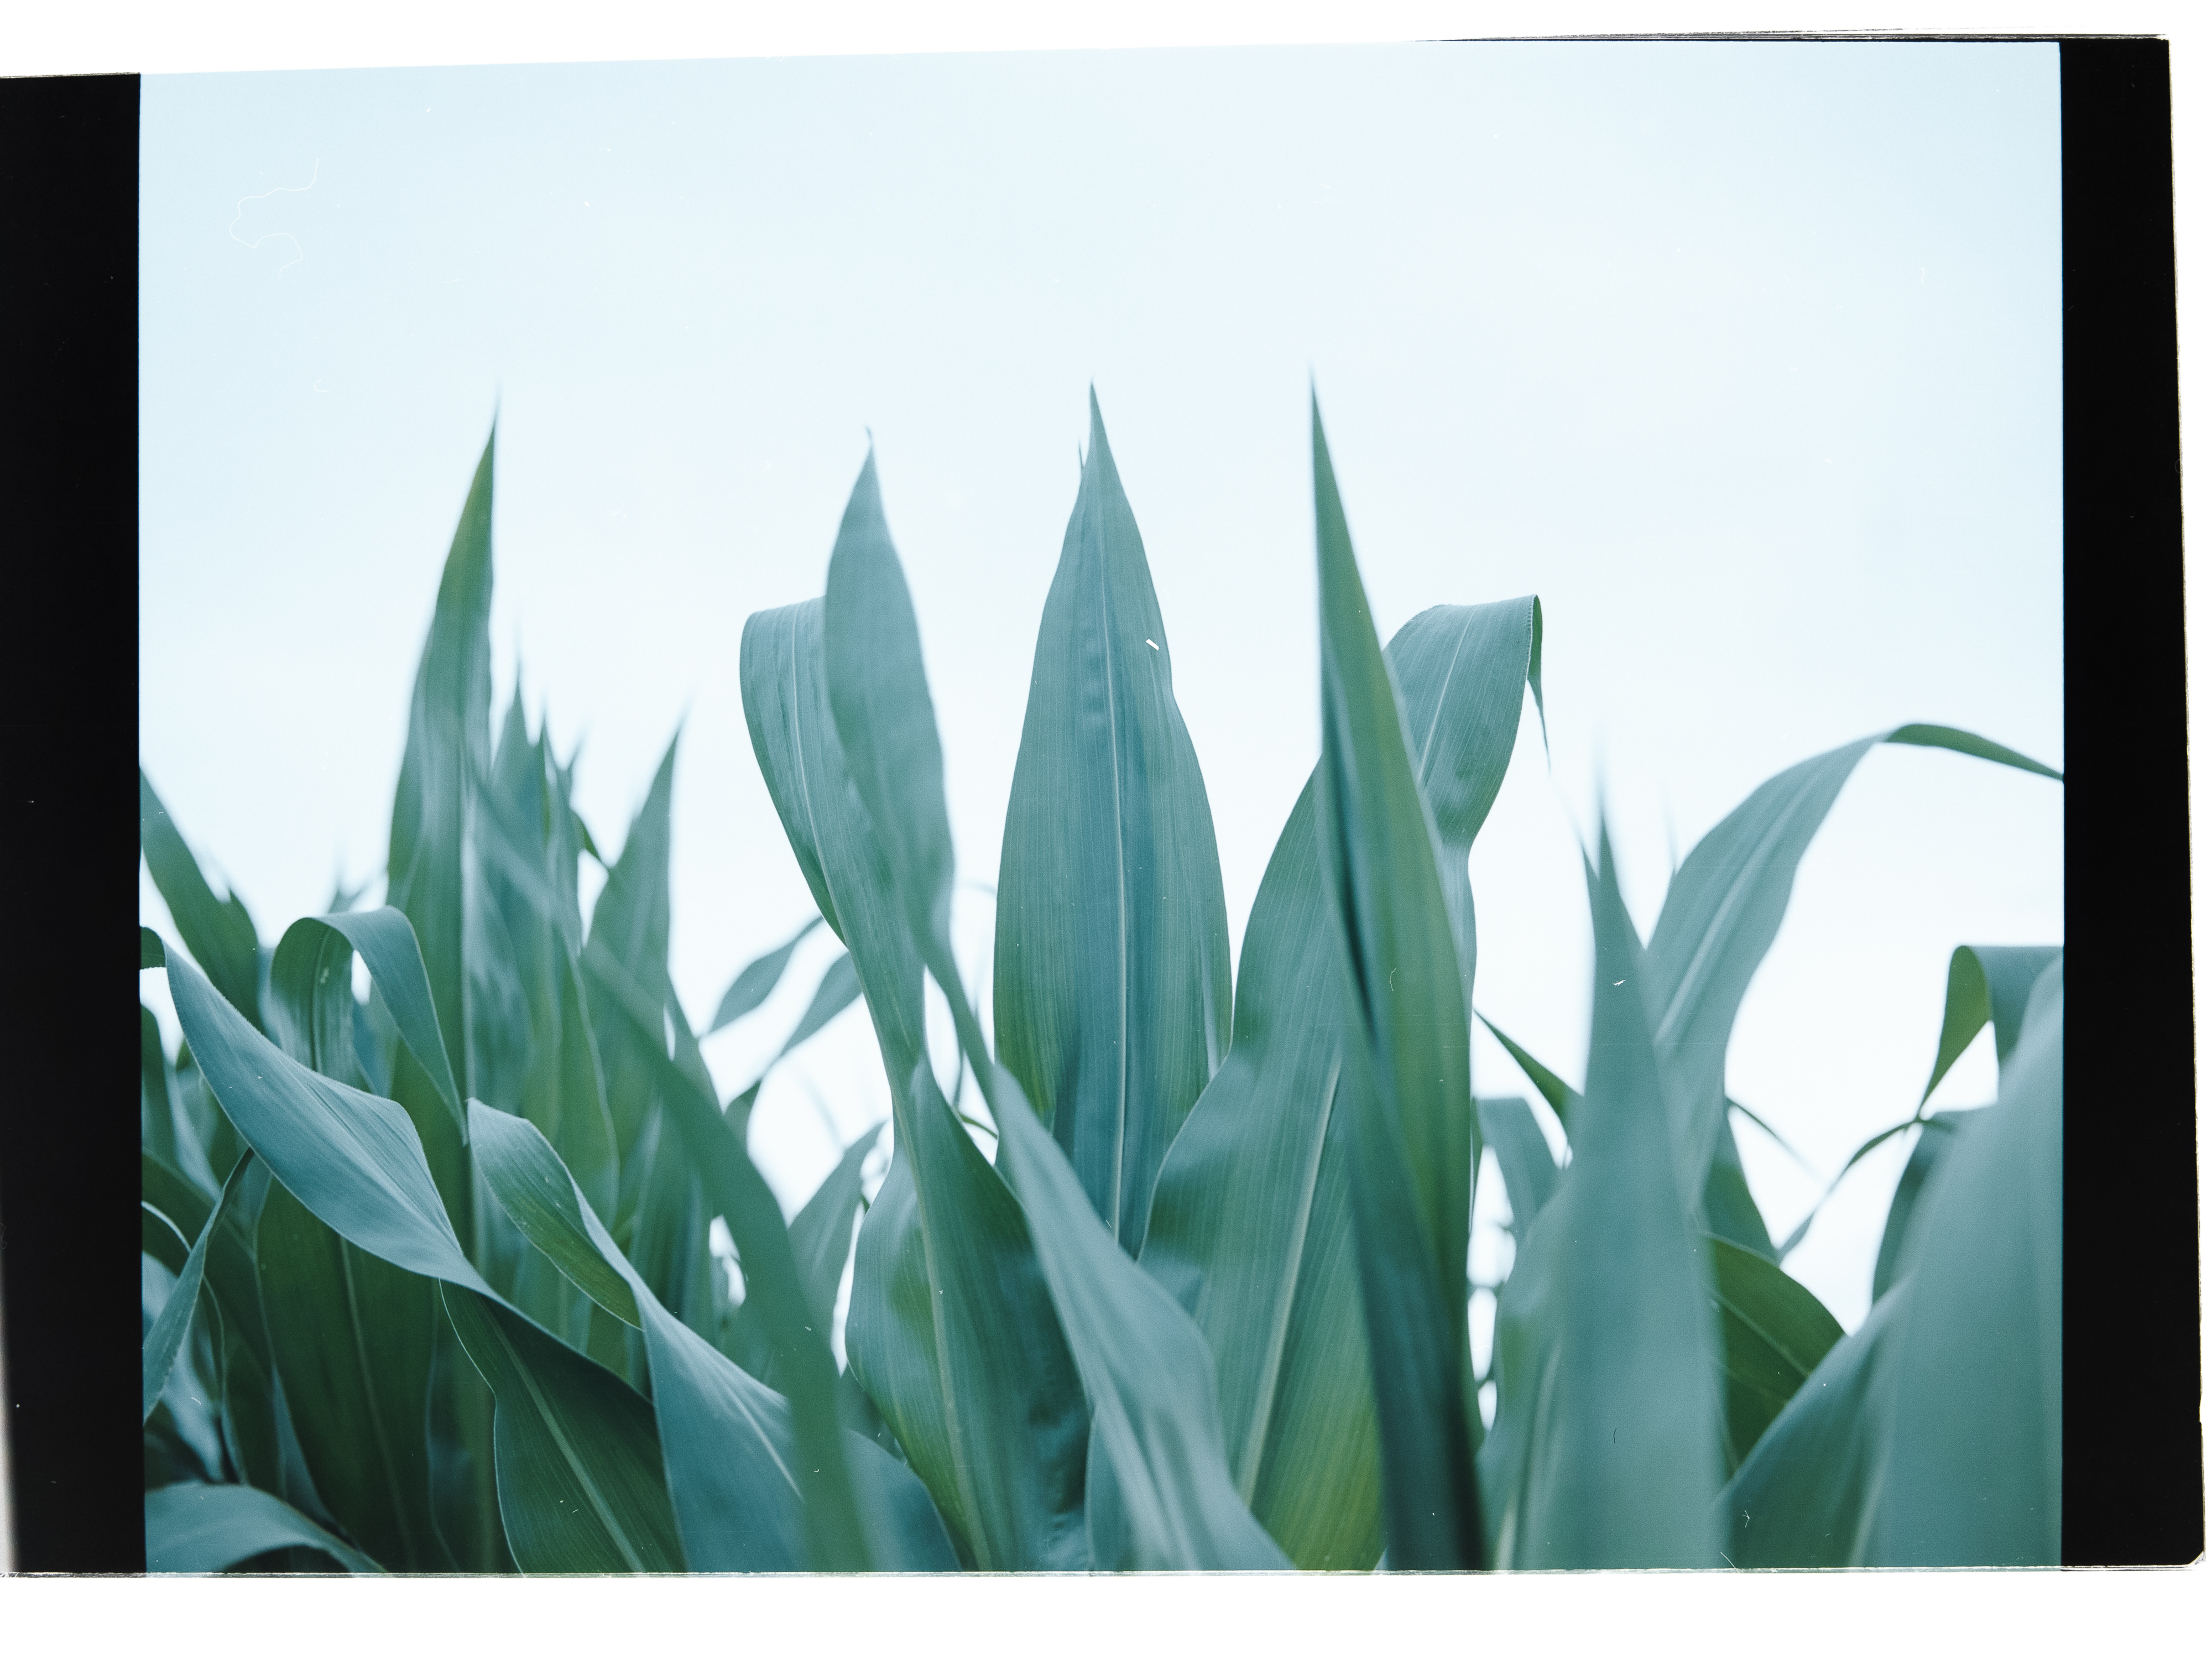
Photographed with my Mamiya 7 II N 80 mm F/4 L on Kodak Portra 160 120 negative film, then converted and post-processed in Adobe Lightroom.
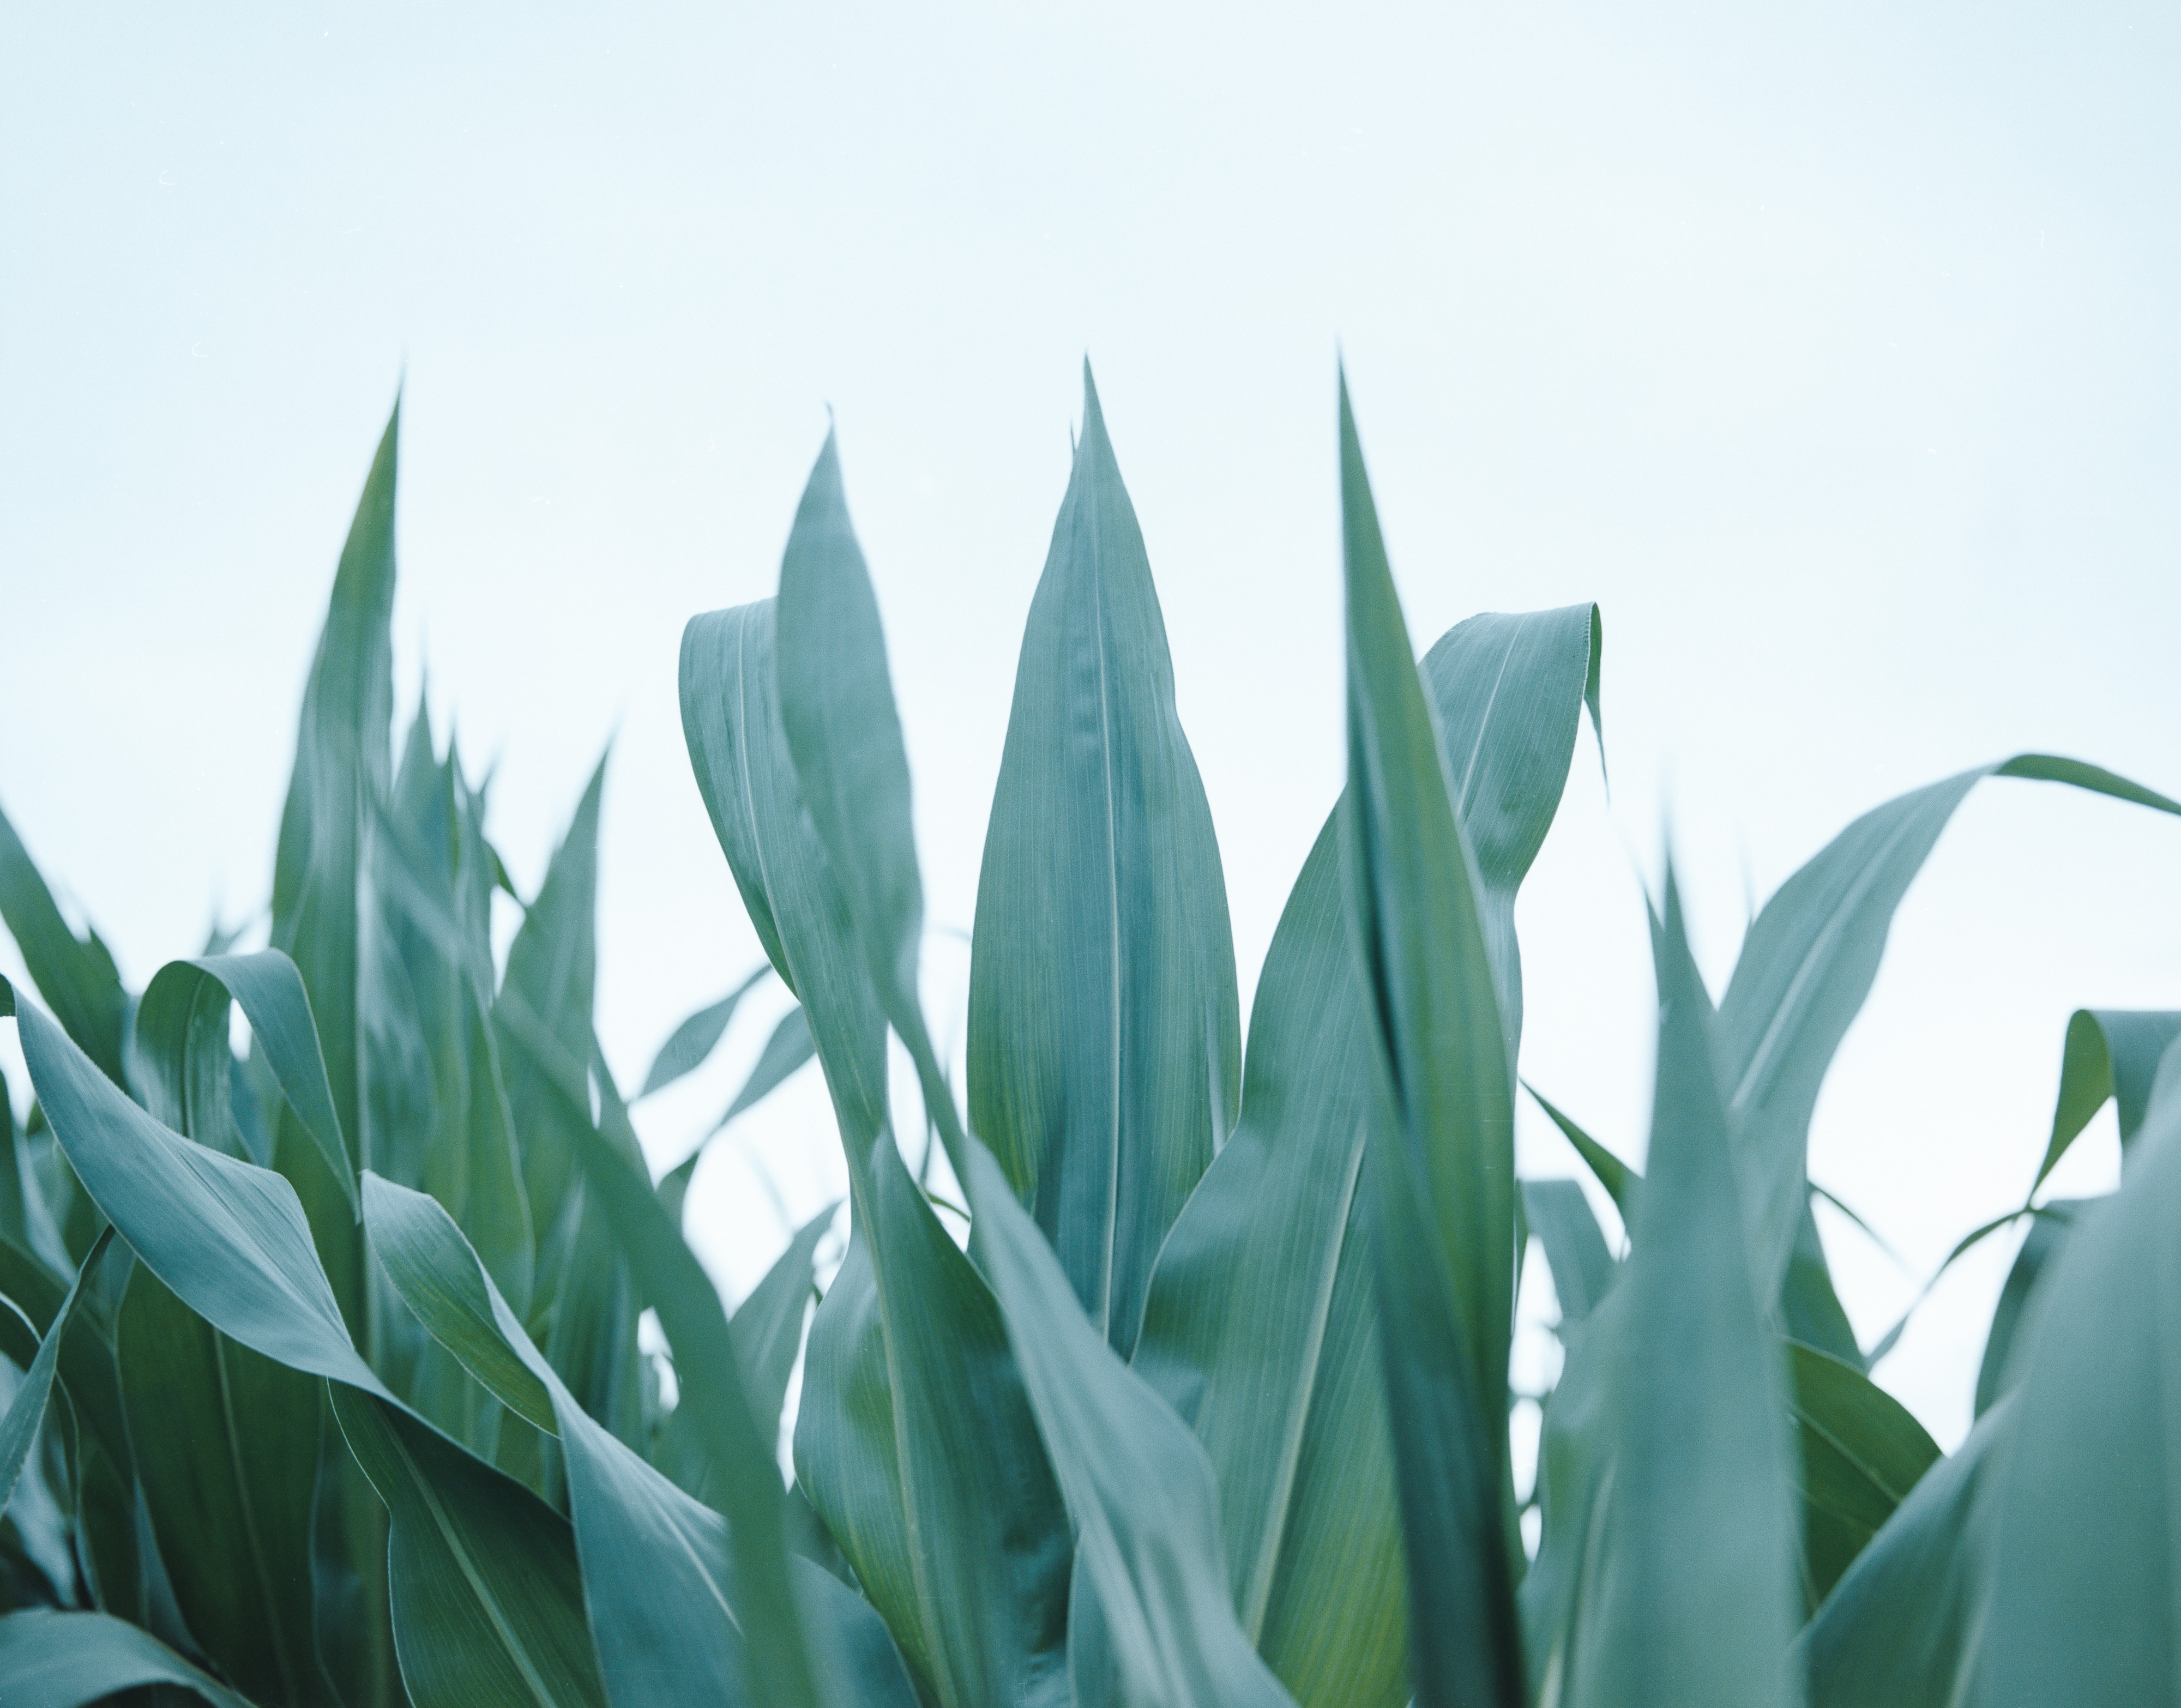
Photographing digital using the RICOH GR II


Photographed with my RICOH GR II and 18.3 mm F/2.8, then post-processed in Adobe Lightroom.
Preliminary comment, part one
Since my old analog film days back in the late 1970s and early 1980s I love the broad tonal range and the rich soft analog pastel shades of film. Modern images by modern digital cameras on the other hand shine with perfect details, unquestioning sharpness and their (sometimes at least in my opinion too) clear look.
After several stations from analog film to digital and a few cameras I decided to go with both: a) Analog film in my beloved old film cameras (Nikon, Hasselblad, Pentax, Mamiya) – I did not sale them fortunately – I could not give them away, I love them to much 😉 , converted and post-processed digitally and b) 100% purely digital on my digital cameras (RICOH and YASHICA).
For my taste both of the above image samples are beautiful – and the digital images by RICOH GR II look film-like. They differ a little by their tones; but this could easily be corrected in Adobe Lightroom; but I can’t decide which one looks better.
In part two of this blog post you will learn how I set up my minimal scan solution for high resolution scans of 35 mm and 120 film negatives in color or black and white.
Which image do you like most? Please let me know – I’d love to hear your opinion.
Did you like this blog post?
Thank you for your comments!
Your comment in the comment section below is highly appreciated, thank you!
Home
Thank you for reading.
You can sign up for my newsletter here.

Very interesting, I am looking forward to the second part. I like the analog more. They are softer and more harmonious. Maybe it’s just because of the colors. Or I just belong to the old guard. 😉
Thank you! The second part is going to be important for those struggling with the decision if to buy a professional negative scanner or not. I did not buy one and instead invested in some time to build up a self made solution, and it works perfectly.
I can see it, actually. 😉
I don’t know, what’s better, I like both of them but which picture do you like: the picture of Mamiya or the picture of Ricoh??
Thank you Cécile, I do not know indeed. The Kodak Portra (taken with the Mamiya) is perfect with it’s tones, the digital image (RICOH) shines with it’s brilliance and clear look. Hmm. I can’t decice.