
Ehrendingen, Lägern. Switzerland. April 11, 2020.
Have you ever asked how to create a visual story?

Visual Storytelling in 7 steps.
- Imagine your story and develop an idea of your image.
- Make your image. Do not take it. Make it.
- Create a working copy and mark your changes by hand.
- Create and sketch your story. Use a storybook.
- Write your story and transfer it to your preferred (blogging) platform.
- Finalize your image, upload it to your blog.
- Publish.
Be warned, it’s a time consuming process combining ideation, imagination, photographic work and writing; and it needs a lot of effort, time and patience! But in the end it is pure satisfaction.
Step 1: Imagine your story and develop an idea of your image
I usually start with a lot of ideas and my own vision, my imagination – long before making the photograph.
Remember Ansel Adams:
«You don’t make a photograph just with a camera. You bring to the act of photography all the pictures you have seen, the books you have read, the music you have heard, the people you have loved.» ― Ansel Adams
A good piece of art – be it a photograph, a painting, a drawing, a sculpture or even a poem or a song – they all start with an idea and a vision (i.e. in ones heart). They will grow slowly, being further developed and built up over time – I call this ‘the inside out process’. Probably there will be some inspiration from the ‘outside in’ – but the overall creative process is ‘inside out’. Let me explain this with an example: During one of my walks the other day across the forests of the Lägern some of the trees were in beautiful harsh backlit, but at this time I was not yet ready for the image (see the image on top).
I kept the backlit scene in my mind for several days and combined it with another idea I had a long time ago: Make an image of the dark soil in a moody wood; the deeps of the soil should be on Zone II or III (see Ansel Adams Zone System). So why not combine those two fictitious images? Slowly the idea grew and developed further; in my imagination I could already see the final image. This is what I call ‘inside out’.
Again Ansel Adams:
«You don’t take a photograph, you make it.» ― Ansel Adams
Step 2: Make your image
Lately I hiked up to the top of the Lägern, where I discovered these beautiful trees on the ridge. This is another image I had been planning for a long time – it should be a fine art print showing the subtle fine greys of the trees and the fine light in their back – rather low contrast monochrome, nearly (if not all) black and white. Happy about this image I left the trail to have a fantastic coffee in the wild, in the middle of nowhere far from the path. After my coffee break I crossed a short untouched wood to get back to the trail again – and there it was: The dark soil of the moody wood – and some glittering bright ice on the path! This was the image I had been planning for a long time (see step 1)!
«What a good coffee in the wild can do!» ― Christian Speck, and many, many others.
See the final image here.
See the exact coordinates of the final image in this map.
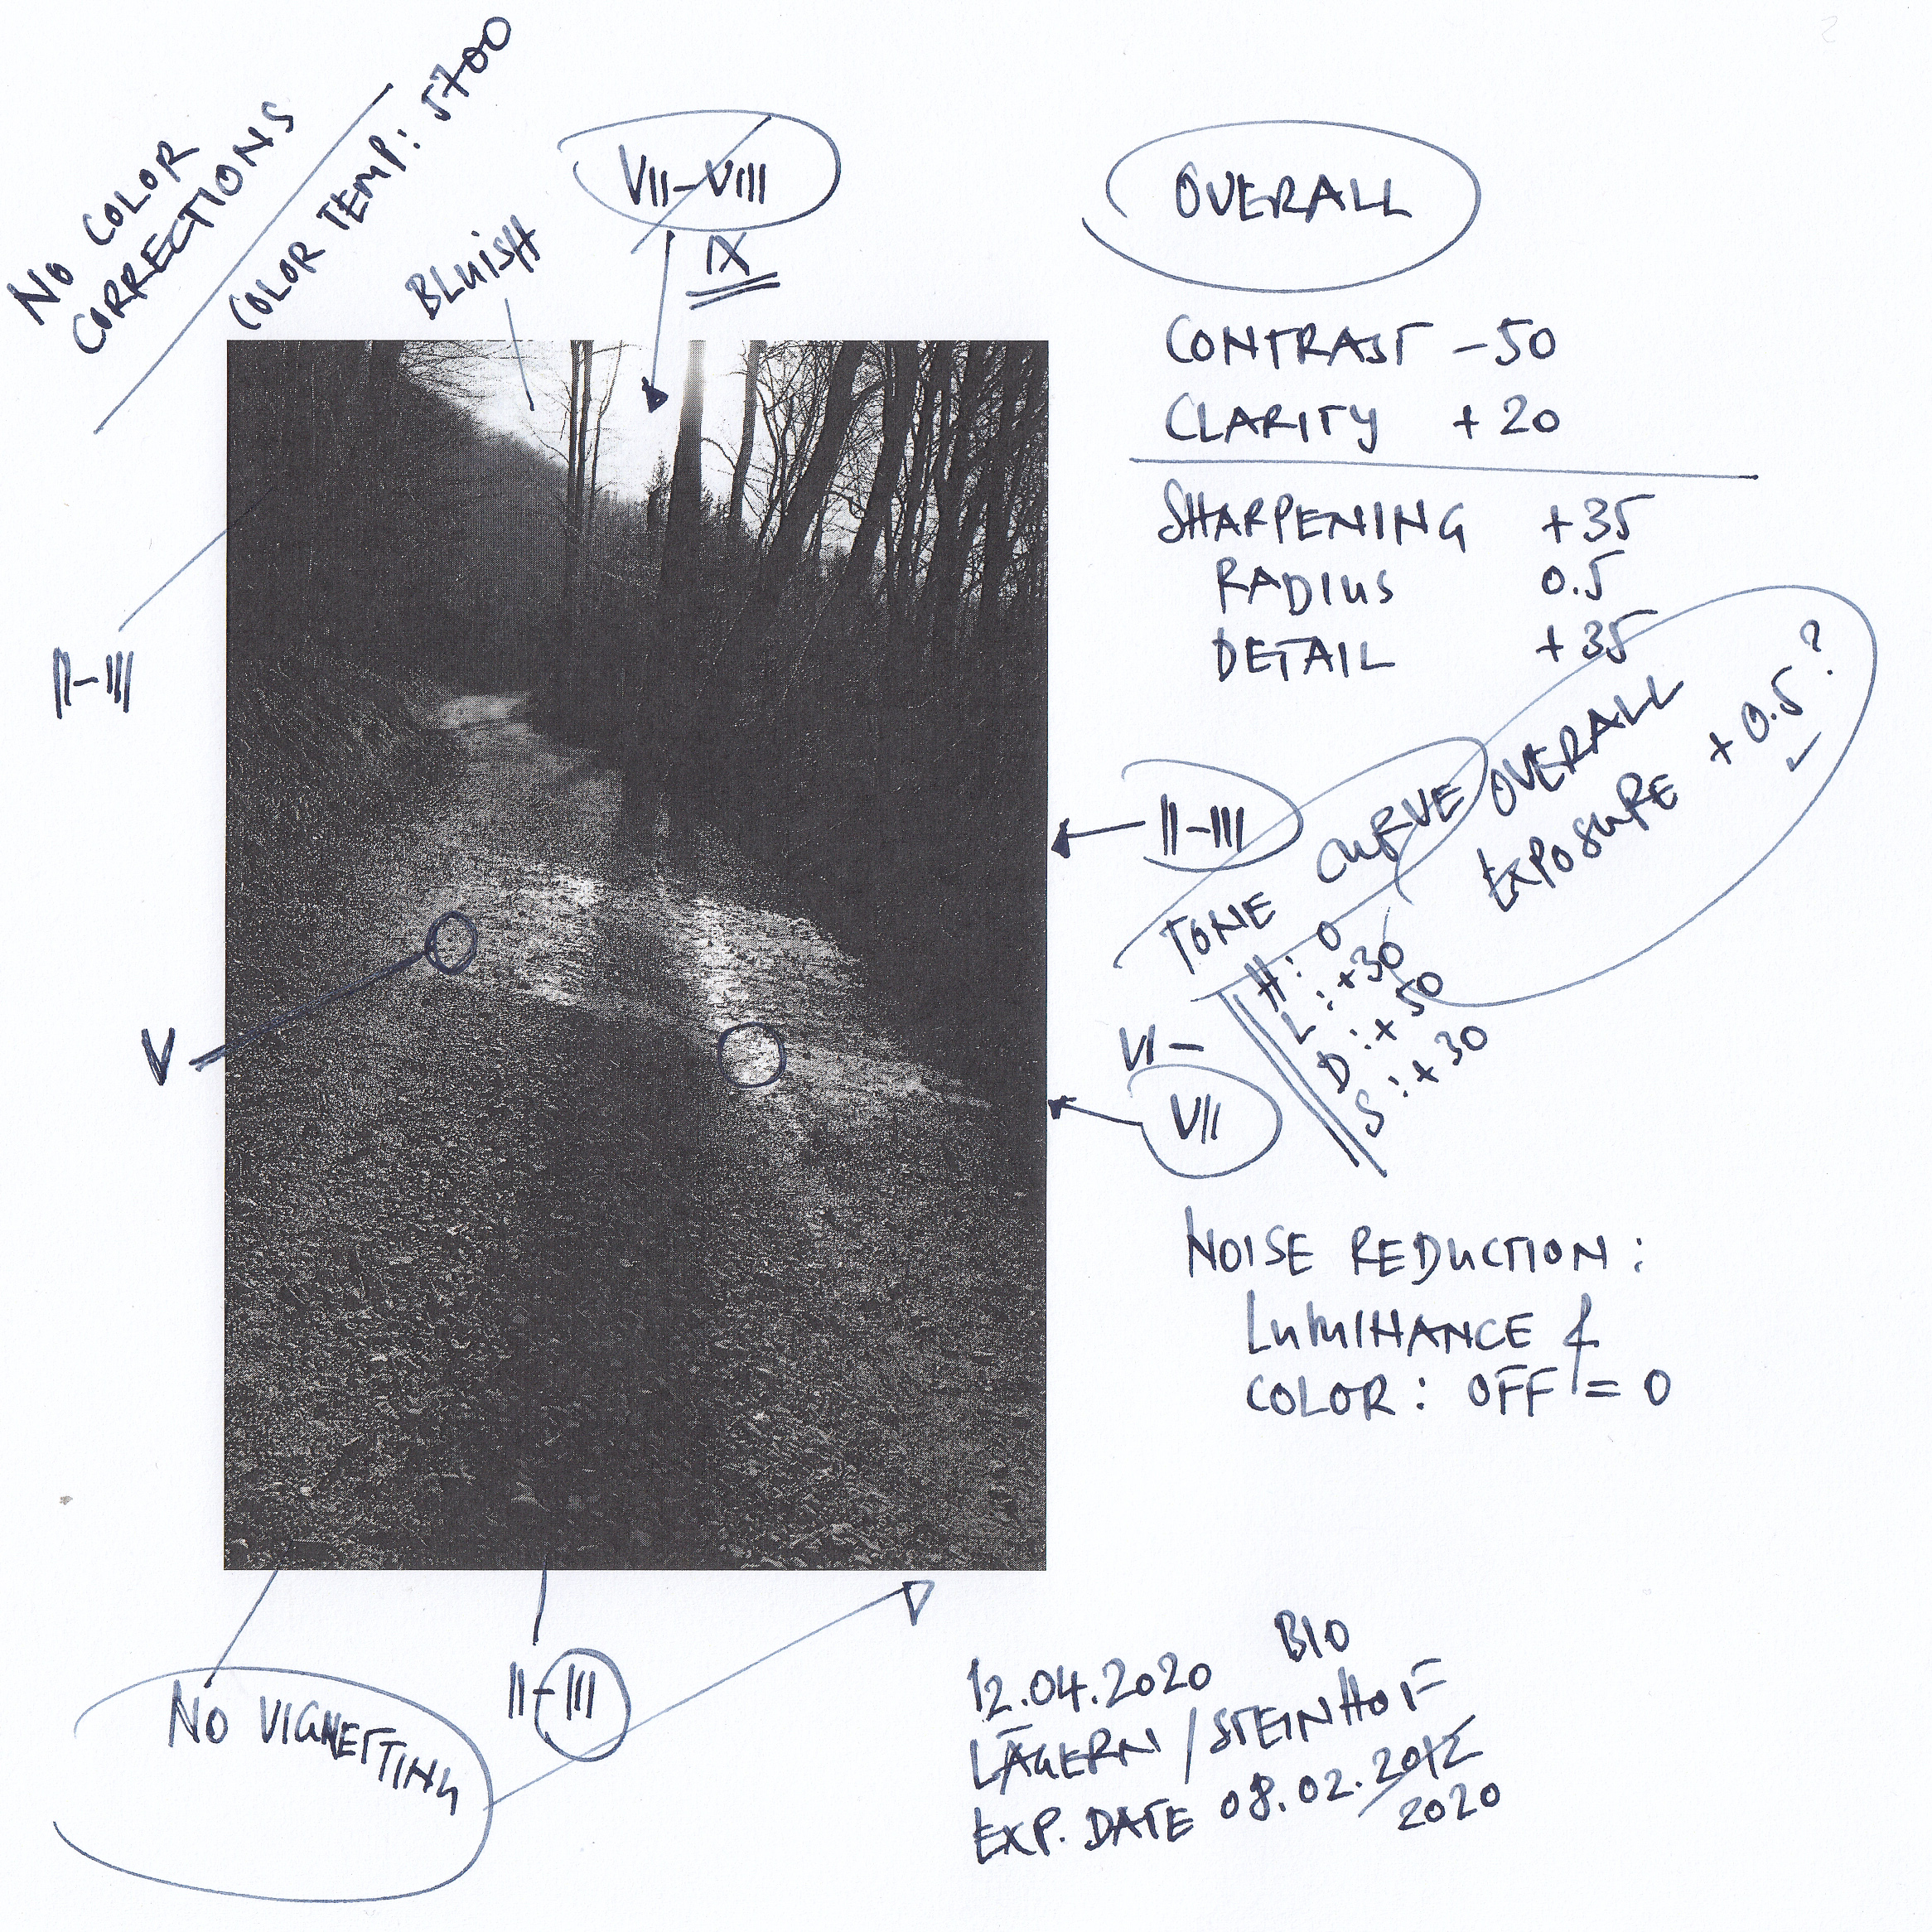
Step 3: Create a working copy and make your changes by hand
In this step your ideas and vision (see step 1) are combined with the image (see step 2).
Below you’ll find an example of a working copy as I use to create it. From the bunch of all the images I usually select two or three, and out of this shortlist finally I choose the best one, print it out – it could be a simple print on any common office printer, even a Laser Printer does the job. Starting with this working copy I write down my notes for further editing. This will look as follows:
Ansel Adams shows a good example of a working copy too in his book The Print, see my old German edition below.


Step 4: Create and sketch your story. Use a storybook.
This is most important, at least for me, and it’s pure fun and anticipation. I usually take my time for this steps, sometimes over a period of a week or two. This can result in a more or less weird collage of keywords, drawings, Post-it’s – whatever you like. You can write on a wall, on a flipchart paper, use a software tool or simply – like I do – write down all my ideas in my notebook. As an example see my Rhodia notebook below.
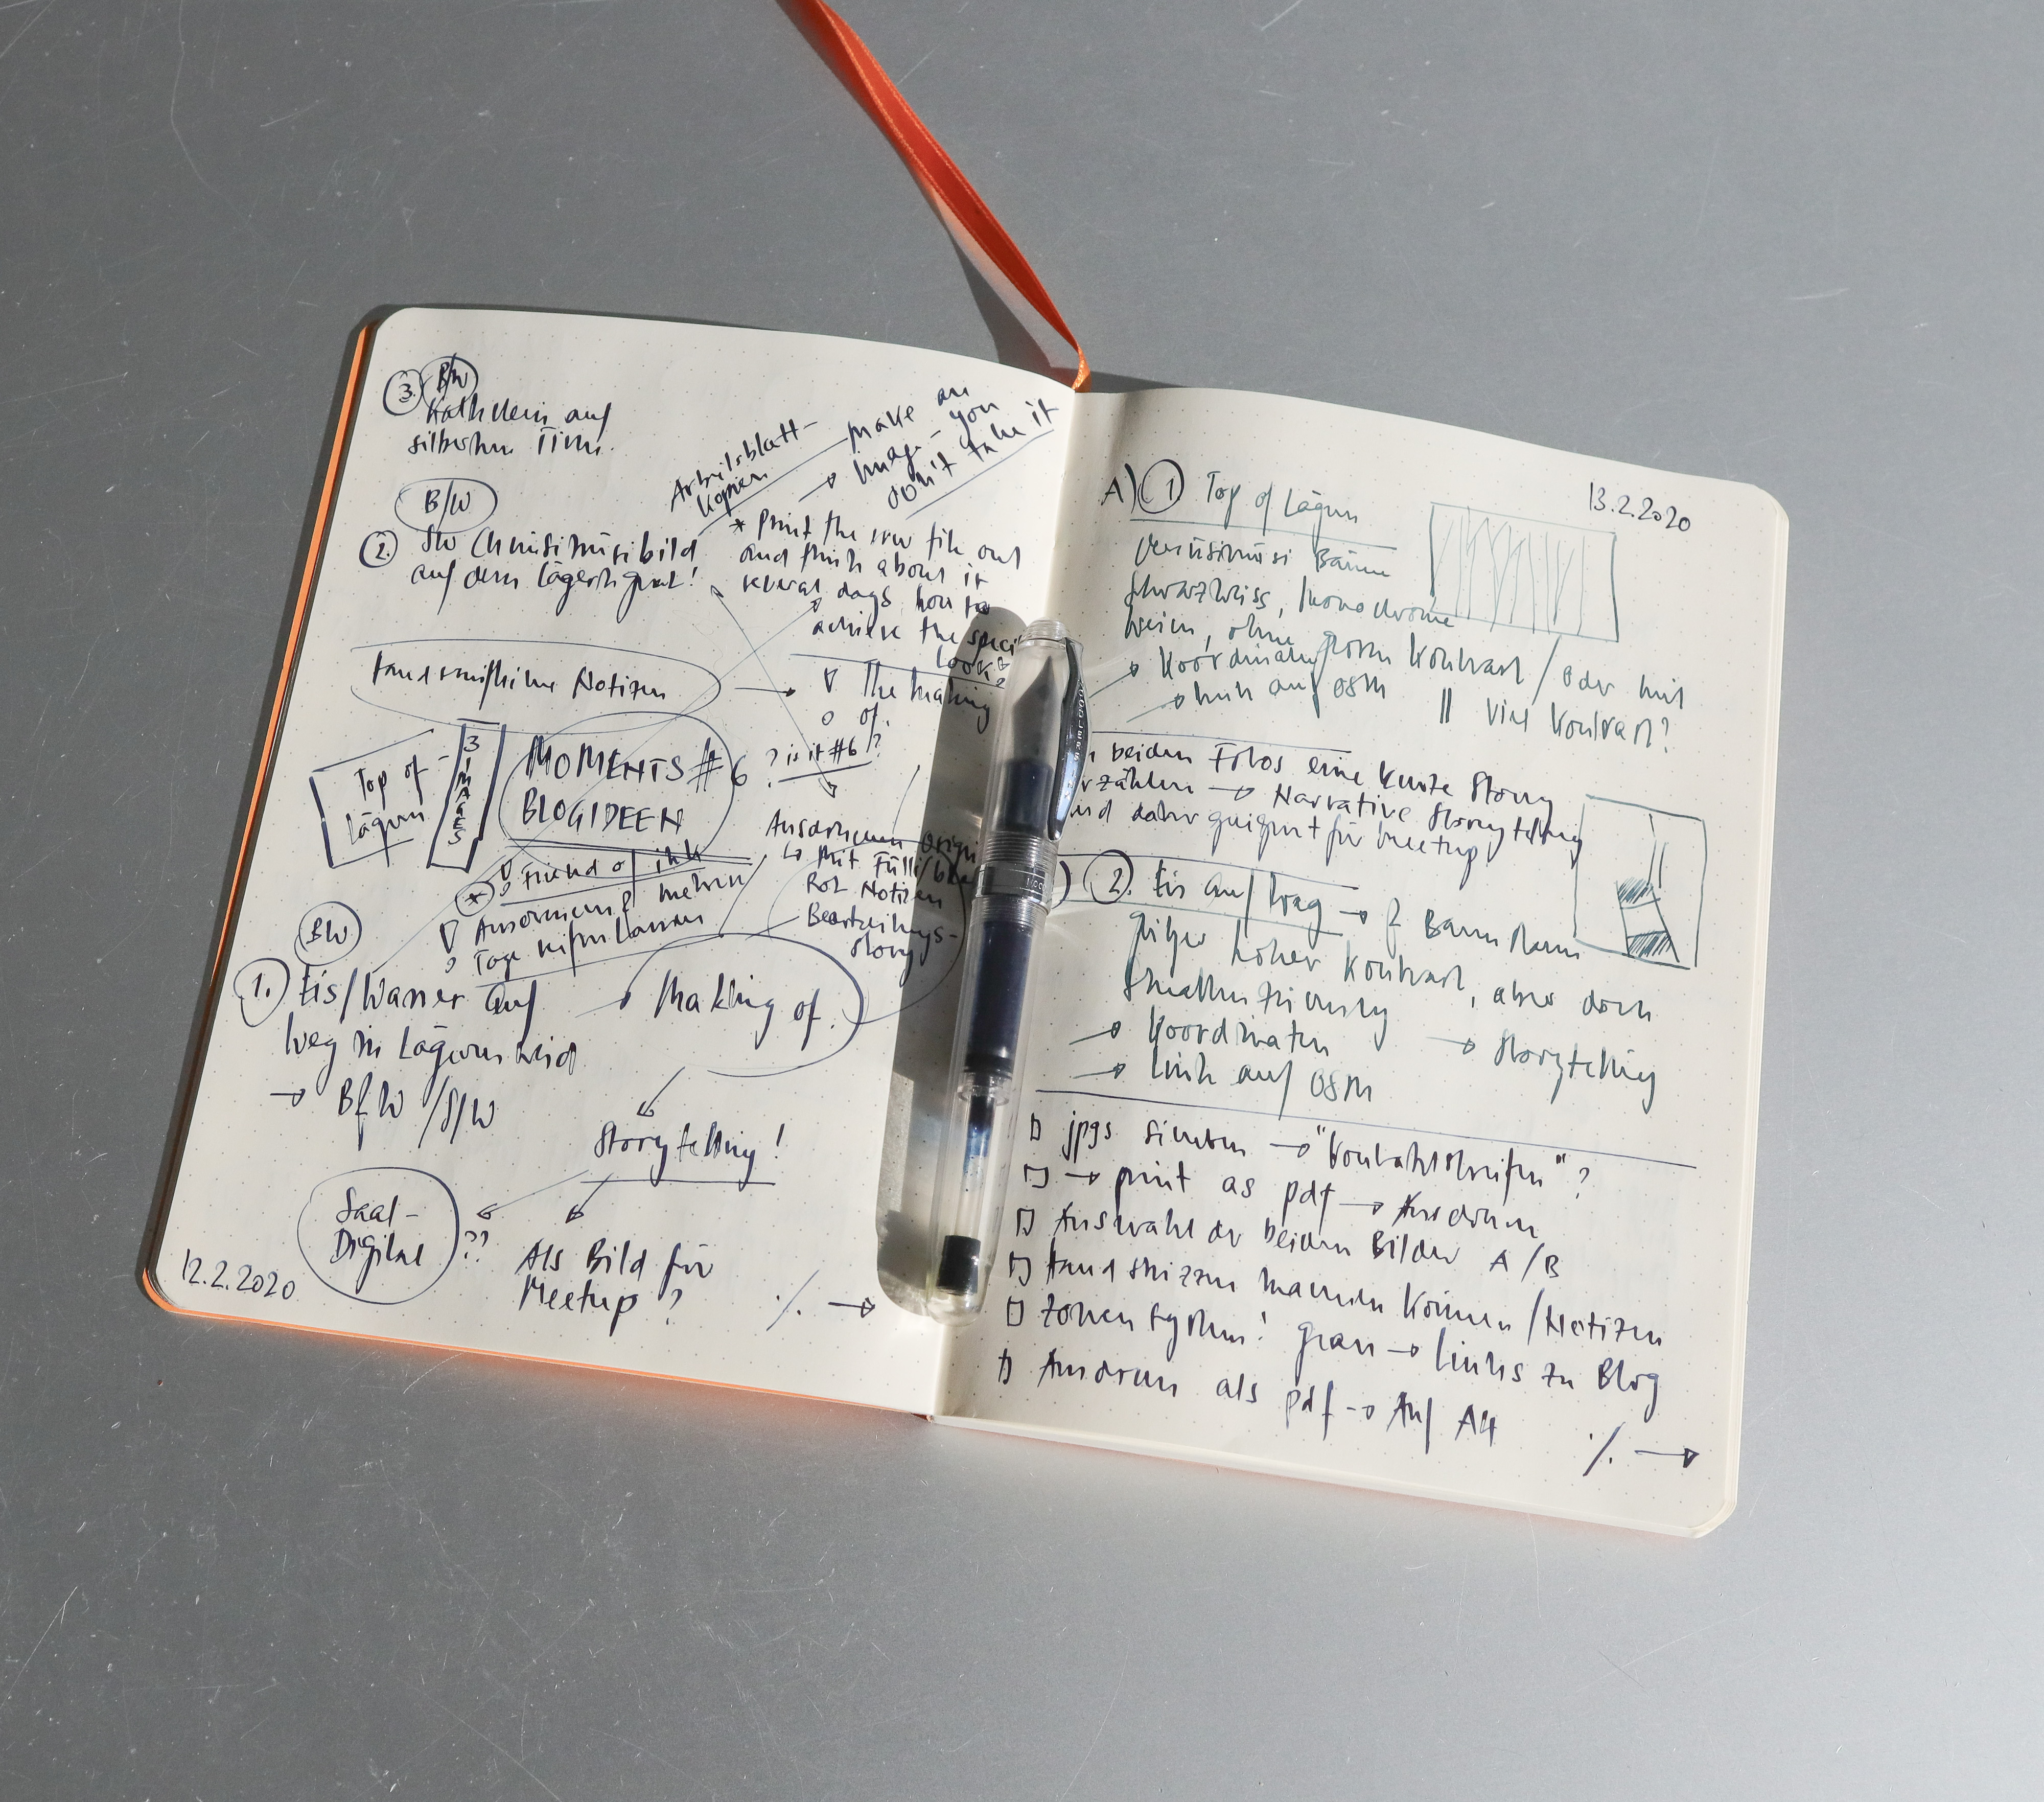

It looks weird – doesn’t it? Sometimes I will continue my story the other day, or make some corrections to my yesterdays thoughts – but ‘good things take time’! You will end up with an ‘almost ready to write’ story, which you can easily transfer into the final format.
Step 5: Write your story and transfer it to your preferred (blogging) platform.
Finding the right words sometimes is not easy, all the more if you speak a foreign language. What helps me most is a clean and simple, distraction-free writing environment so I can fully focus on my words. I use iA Writer on Apple and Windows for my writing, because of its clean and simple interface – to me it is almost distraction-free. At the end the final story is transferred to the destination platform, in my case this is my self-hosted blog running on WordPress. Of course this is a very personal matter of taste, you could use whatever platform and tools you like!
Step 6: Finalize your image, upload it to your blog
Once your text is finalized and ready to be published you should put the finishing touches on your image and import it into your story.

The final image. [click for full resolution]
Step 7: Publish
And here we go: After the final quality check publish your story! You won’t imagine how much work it takes to get to this point, and even more the fantastic and satisfying feeling if you hit the ‘Publish’ button.
How much work will you have to invest?
It depends – as always. Take this blog post as an example. The effort for this blog post roughly estimated would be:
- Imagine your story and your image: 6 hrs.
- Make your image […]: 6 hrs.
- Create a working copy […]: 2 hrs.
- Create and sketch your story […]: 8 hrs.
- Write your story and transfer it […]: 12 hrs.
- Finalize your image […]: 4 hrs.
- Publish: 1 second.
- Enjoy it: For a lifetime.
Is it worth all the effort?
Yes of course it is worth spending that much time on it. All the hours spent help me rethink all my experiences once again and help me getting better.
What if there will be no comments, no feedback from your audience? Still, you are writing your experiences and your thoughts primarily for yourself. Of course a comment or a controversal discussion every once in a while would be highly motivating. But keep in mind, the main part of your audience will quietly follow; they will be pretty well informed what’s going on ‘on your channel’, but most of them will never leave a comment.
If you found this post helpful and encouraging please leave me a comment below. Or if there are any questions – please do not hesitate to ask!
I appreciate your feedback a lot. Thank you!
Photography: Canon EOS R, RF 35 1.8. Edited in Adobe Photoshop Lightroom.
Handwritten documents: Noodler’s Ahab w Noodler’s flex nib. Ink: Rohrer & Klingner (Salix 711). Paper: Normal Office Printer Paper and Rhodia Rhodiarama A5 Flex Cover Dot Pad.
Home
Thank you for reading.
You can sign up for my newsletter here.

Webmentions
[…] From my article “Visual Storytelling in 7 Steps“ […]
[…] to enlarge]See my blog post Visual Storytelling in 7 steps [click to enlarge]See my blog post Visual Storytelling in 7 […]